Before touching a single anti-spam policy, verify that SPF, DKIM and DMARC are correctly configured and passing by following the basic domain email setup, because Microsoft’s own filtering logic leans heavily on authentication results when scoring incoming mail. Once that foundation is confirmed, apply the Standard preset policy as your baseline (moving up to Strict only for high-risk mailboxes), quarantine high-confidence detections rather than sending them to Junk, and resist the temptation to build broad allowlists. Pilot every change on a small group before rolling it tenant-wide.
TL;DR:
Table of Contents
- What you need to know before touching Office 365 spam filtering
- Preset security levels: default, Standard and Strict compared
- How to create and modify anti-spam policies in the Defender portal
- Allow and block lists: limits and safer alternatives
- Managing anti-spam policies with PowerShell
- How to diagnose why a message was marked as spam
- Ongoing tuning: monitoring cadence and best practice
- When to bring in a deliverability audit or consultant
- What experienced admins get wrong about spam filtering
- Get expert help fixing what filtering alone can’t solve
- Sources
- FAQ
What you need to know before touching Office 365 spam filtering
Getting spam filter settings right in Office 365 starts with knowing who can change what, and where. Most tuning happens in the Microsoft Defender portal, though some tasks (particularly bulk edits and anything involving large allow or block lists) are faster and safer done through Exchange Online PowerShell. You’ll need Security Administrator or Organization Management permissions in Microsoft Entra ID to create or modify anti-spam policies; Global Reader access lets you view but not change settings, which is handy for helpdesk staff who need visibility without the risk of a fat-fingered edit.
It also helps to understand the order in which a message is actually judged. Mail arriving at your tenant passes through several distinct stages before it lands in an inbox or a quarantine folder:
- Connection filtering checks the sending IP’s reputation and can reject known bad sources before any content is even inspected.
- Policy filtering applies your recipient-level rules and exceptions.
- Anti-spam and anti-phishing filtering scores the message content, links and sender behaviour.
- Post-delivery protection, including zero-hour auto purge (ZAP), re-evaluates messages that have already reached the mailbox and can pull them back retroactively.
This layered filtering pipeline explains why a message can sit in an inbox one moment and vanish into quarantine the next: ZAP acted on new intelligence after delivery, not before it.
Authentication sits underneath all of this. If SPF, DKIM or DMARC are missing or misaligned, legitimate mail is more likely to be pushed to Junk or quarantine, because the filtering engine treats weak or absent authentication as a risk signal in its own right. If you’re running a hybrid environment with an on-premises Exchange server, remember that mail routed through a connector can bypass some cloud-native checks unless the connector is configured to preserve authentication headers, and Outlook’s client-side junk filter can quietly override server-side decisions for individual mailboxes if users have altered their own settings.

Pro Tip: Run Microsoft’s configuration analyser (sometimes called ORCA) before making any policy change. It compares your current settings against Microsoft’s recommended baseline and flags deviations you might not have noticed, which is far quicker than auditing every policy by hand.
Preset security levels: default, Standard and Strict compared
Every Office 365 tenant starts on the built-in Default policy, but Microsoft publishes two additional preset profiles, Standard and Strict, that most organisations should be running instead. The recommended settings documentation sets out exactly how these presets differ in their handling of spam, high-confidence spam and phishing, and the differences matter more than most admins expect.
- Default applies the lightest touch: spam typically moves to Junk, and only the most obvious phishing gets quarantined.
- Standard raises the bar, routing high-confidence spam and phishing straight to quarantine rather than leaving the decision to the end user’s Junk folder.
- Strict applies the tightest thresholds against bulk complaint level (BCL) and spam confidence level scoring, which increases the quarantine rate for borderline messages and inevitably catches more false positives along with the false negatives.
That trade-off is the whole decision in miniature. Strict can catch more threats, but it also means more legitimate newsletters, automated notifications and marketing mail may land in quarantine, resulting in more end-user quarantine notifications and administrative review. A reasonable rule of thumb: adopt Strict for finance, HR and executive mailboxes where the cost of a missed phishing attempt vastly outweighs the annoyance of a false positive, and keep general staff on Standard unless you have the resource to review quarantine daily.
How to create and modify anti-spam policies in the Defender portal
The Defender portal’s anti-spam policy wizard walks you through the same core stages every time, whether you’re creating a new policy or editing an existing one. Getting the sequence right avoids the most common admin mistake: rolling out a policy that’s stricter than intended to the entire organisation on day one.
- Navigate to Email & collaboration > Policies & rules > Threat policies > Anti-spam policies in the Defender portal.
- Choose to create a new policy or edit an existing one, and give it a clear, descriptive name reflecting its scope, not just “Policy 2”.
- Set the recipient filters under the “Users, groups and domains” section. This is where you scope the policy to a pilot group rather than the whole tenant, and where you can add exceptions for mailboxes that need different treatment.
- Configure Actions for each detection category (spam, high-confidence spam, bulk email, phishing) and decide whether each moves messages to Junk or to quarantine.
- Review the Allow & block section for the policy and, separately, check whether the Tenant Allow/Block List needs updating for this scenario.
- Set the bulk complaint level threshold if the default BCL sensitivity doesn’t suit the mailboxes in scope.
- Confirm whether ZAP is enabled for spam and phishing (it should be, in almost every case) on the Review page before saving.
- Check the priority value relative to your other custom policies. Lower numbers take precedence, and an incorrectly ordered policy can silently override the one you meant to apply.
Once live, monitor the policy’s initial impact for at least a week using quarantine volume and the Threat Explorer view before expanding its scope. Keep a rollback note (the previous action settings, in plain text) so you can revert quickly if a pilot group starts reporting missing legitimate mail.
Pro Tip: Never set a new custom policy’s priority to a lower number than an existing policy without checking what that policy currently governs. Two overlapping policies with conflicting priorities is one of the fastest ways to create an invisible mail routing fault.
Allow and block lists: limits and safer alternatives
Mailbox-level Safe Senders lists, policy-level allow and block entries, and the Tenant Allow/Block List all do slightly different jobs, and conflating them is where most admins get into trouble. The Tenant Allow/Block List has largely superseded older mailbox-level methods for tenant-wide control, but it comes with a practical limit worth knowing before you hit it.
- The Defender portal’s UI restricts you to adding a limited number of entries per flyout at a time, which can become slow if you’re trying to add a long list of sender domains.
- For larger lists, use Exchange Online PowerShell instead of the portal to efficiently manage entries.
- Domain-level allowlisting is genuinely risky: it tells the filter to trust every message from that domain regardless of content, which spammers exploit the moment a domain is spoofed or compromised.
- A safer pattern is address-level allowlisting for specific known senders, combined with reporting persistent false positives to Microsoft so the underlying detection model improves rather than just papering over the symptom.
Reserve tenant-wide block entries for confirmed malicious senders and use policy-level exceptions for narrower, legitimate business cases, such as a specific automated system that keeps triggering bulk detection. It’s worth remembering that connection filtering runs on IP reputation before any allowlist entry is even consulted, so an allowlist attempt that ignores a poor sending reputation, or lacks correct SPF and DKIM, can fail outright or open a security gap you didn’t intend.
Managing anti-spam policies with PowerShell
The Defender portal is fine for occasional edits, but once you’re managing multiple policies, large exception lists or repeatable tenant configurations, Exchange Online PowerShell becomes the more reliable tool. A handful of cmdlets cover most of what an admin needs day to day:
Get-HostedContentFilterPolicyandNew-HostedContentFilterPolicyview and create inbound anti-spam policies.Set-HostedContentFilterPolicymodifies an existing policy’s actions, BCL threshold or ZAP settings.New-HostedContentFilterRuleandSet-HostedContentFilterRuleassociate a policy with specific recipients and control its priority.Get-HostedOutboundSpamFilterPolicyandSet-HostedOutboundSpamFilterPolicymanage outbound spam controls, useful when a compromised account starts sending bulk mail.New-TenantAllowBlockListItemsandGet-TenantAllowBlockListItemshandle allow and block entries at scale, well beyond the portal’s practical limits.
A typical pattern is creating a scoped filter policy, then a matching rule that ties it to a specific group and sets its priority, all in a single script that’s version-controlled somewhere your team can audit later. The most common pitfall is forgetting that a rule’s Priority value determines precedence independently of when the policy itself was created, so a hastily scripted policy can silently override a carefully tuned one if priorities aren’t set deliberately.
Pro Tip: Always export your current policy configuration with Get-HostedContentFilterPolicy | Export-Csv before running bulk changes. It takes thirty seconds and gives you an exact rollback point if a scripted change behaves unexpectedly across the tenant.
How to diagnose why a message was marked as spam
When a user reports a missing email, or a phishing attempt slips through, the first place to look is the message header, specifically the X-Microsoft-Antispam and X-Forefront-Antispam-Report fields. These contain the bulk complaint level (BCL) score and the spam confidence level (SCL) that drove the filtering decision, and reading them correctly turns a guessing exercise into a two-minute diagnosis.
- Retrieve the full message headers, either from the user’s Outlook client (via the message properties) or through the Defender portal’s message trace tool.
- Locate the BCL value: a low BCL suggests the sender isn’t behaving like a bulk mailer, while a high BCL points towards a mailing list or marketing platform that’s tripping your bulk email threshold.
- Cross-reference the SCL and any authentication failure flags (SPF, DKIM or DMARC results embedded in the header) to see whether weak authentication contributed to the verdict.
- Run a message trace for the specific message ID to see exactly which policy and rule applied, and at what stage of the pipeline the decision was made.
- Check whether zero-hour auto purge subsequently moved the message after initial delivery; ZAP can retroactively quarantine something that looked clean minutes earlier, which explains a lot of “it was there, then it wasn’t” reports.
- If the verdict was wrong in either direction, submit it to Microsoft as a false positive or false negative through the Defender portal’s submission tool, which feeds back into the detection model over time.
Bulk senders insight, found under the Defender portal’s reporting section, is worth checking regularly too: it surfaces which senders are triggering the most bulk-mail detections across your tenant, often revealing a legitimate platform that needs a policy exception rather than a blanket block.
Ongoing tuning: monitoring cadence and best practice
Spam filtering isn’t a set-and-forget configuration; sender behaviour, phishing tactics and your own organisation’s mail patterns shift constantly, and a policy that worked well in January can start misfiring by summer. The safest approach is a pilot-based cycle: scope a change to a small group, monitor quarantine volume and false positive reports for a defined period, adjust BCL thresholds or actions based on what you see, and only then expand to the wider tenant.
A handful of metrics deserve a recurring slot on your monitoring calendar:
- False positive rate, tracked through user-reported “missing email” tickets against quarantine release requests.
- Total quarantine volume per policy, watched for sudden spikes that might indicate a misconfigured rule or a genuine attack wave.
- Top bulk senders, reviewed monthly to catch legitimate platforms before frustrated users start complaining.
- Authentication failure trends, since a sudden rise often signals a DNS change gone wrong rather than a filtering problem at all.
Avoid the shortcut that seems fastest under pressure: a broad allowlist added in a hurry to stop complaints. It almost always causes more security exposure than the inconvenience it removes, and treating filtering as one layer within a wider defence rather than the sole control matters here. Fix authentication issues first, every time, before reaching for a filter exception; a misconfigured SPF or DKIM record is very often the real cause of a false positive that a hasty allowlist only masks.
Pro Tip: Keep a simple change log, even a shared spreadsheet, noting the date, the policy changed, the previous setting and the reason. It sounds basic, but it’s the single fastest way to work out which change caused a spike in complaints three weeks later.
When to bring in a deliverability audit or consultant
Policy tuning has a ceiling. If you’ve applied the Standard or Strict preset, corrected obvious authentication gaps and you’re still seeing legitimate mail bounce, land in Junk, or get silently dropped by receiving providers, the problem usually sits outside Exchange Online’s filtering settings entirely. That’s the point at which a structured deliverability audit tends to reveal what internal tuning can’t.
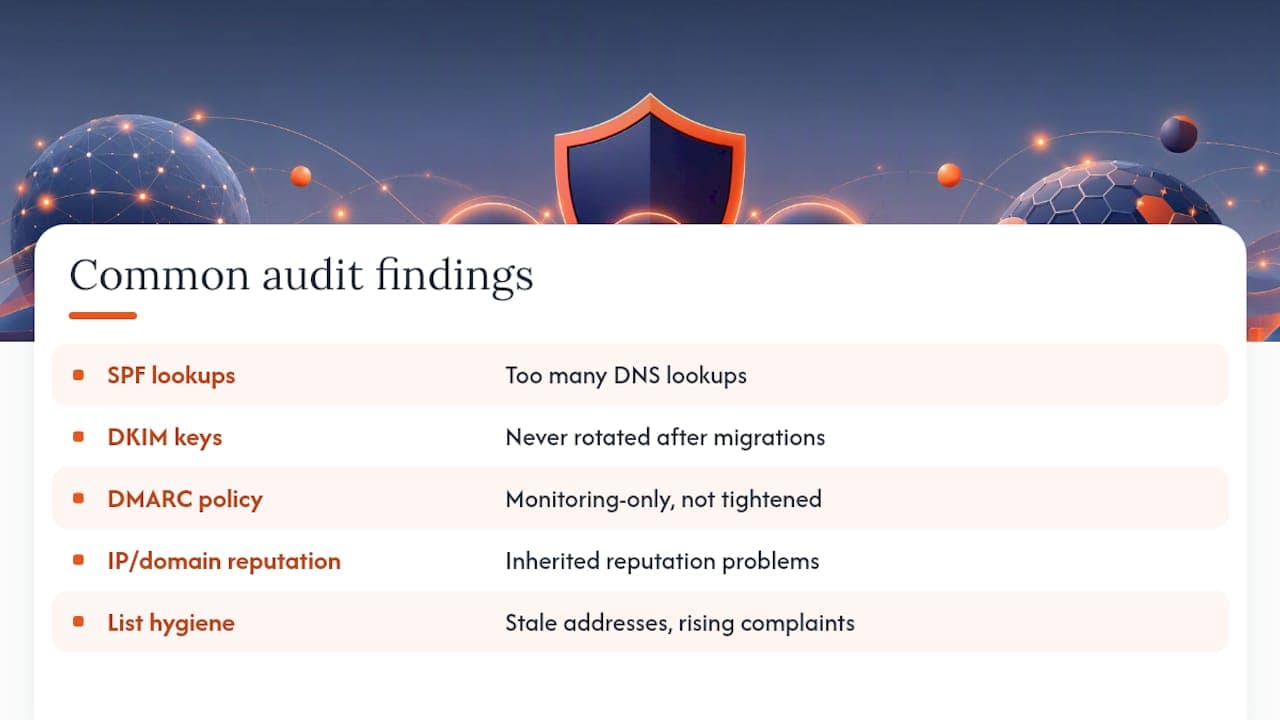
Common findings from this kind of review include SPF records with too many DNS lookups, DKIM keys that were never rotated after a platform migration, DMARC set to a monitoring-only policy that’s never been tightened, and IP or domain reputation issues carried over from a previous sender that nobody flagged. List hygiene is another recurring culprit: stale subscriber addresses generating spam complaints that quietly erode sender reputation over months.
A proper audit complements Defender policy tuning rather than replacing it; the two work on different layers of the same problem. Before engaging a consultant, gather your current SPF, DKIM and DMARC records, recent bounce and complaint data if your platform reports it, and a summary of any recent sending infrastructure changes. That preparation alone can cut diagnostic time significantly.
What experienced admins get wrong about spam filtering
The biggest mistake I see repeated across organisations of every size is treating spam filtering as a switch to flip rather than a system to maintain. Admins reach for a global allowlist the moment a VIP complains about a missing email, and that single decision often undoes months of careful tuning by opening a hole a spoofed sender can walk straight through.
The fix is unglamorous: check authentication first, pilot every change on a small group, and write down what you changed and why. None of that is exciting, but it’s the difference between a tenant that stays secure under pressure and one that accumulates exceptions nobody remembers approving. Most of the “our filter is broken” tickets I’d expect to see trace back to a DNS record, not a filtering policy at all.
Get expert help fixing what filtering alone can’t solve
Digistrat is the practical next step for organisations that have already applied Standard or Strict presets and tightened Defender policies, but are still watching legitimate mail bounce or land in Junk. Unlike generic filter tuning, our audits look specifically at sender reputation, authentication records and list hygiene, the layers that sit outside Exchange Online’s control panel entirely and that policy adjustments alone cannot fix.
An Email Deliverability Audit from Digistrat typically uncovers SPF and DKIM configuration errors, DMARC policies left in monitoring mode for years, and sending architecture issues that quietly cap your inbox placement regardless of how well your Office 365 spam filter settings are tuned. For businesses running ongoing campaigns, our reputation monitoring service tracks sender health continuously, so problems get caught before complaint rates spike. If your organisation depends on email revenue and you’re ready to see exactly what’s holding your deliverability back, book an audit with Digistrat and get a clear, prioritised remediation plan.
Sources
FAQ
Does Office 365 have a spam filter?
Yes. Microsoft 365 includes built-in anti-spam protection through Exchange Online Protection, part of the layered filtering pipeline that covers connection filtering, content-based scoring and post-delivery detection.
How do I configure the spam filter in Office 365?
Configure anti-spam policies through the Microsoft Defender portal under Threat policies, where you can apply the Standard or Strict preset, scope custom policies to specific users or groups, and set actions for spam, high-confidence spam and phishing.
How can I bypass spam filtering in Office 365?
You shouldn’t bypass filtering with a broad allowlist, as this creates a security gap; instead, add specific trusted senders through address-level exceptions or the Tenant Allow/Block List, and fix any underlying SPF, DKIM or DMARC issues causing the false positive.
Does Outlook have a built-in spam filter?
Outlook applies a client-side junk email filter on top of server-side Exchange Online filtering, but the policy-level verdict from Defender typically takes precedence over individual mailbox-level safelist settings.